Friday, September 30, 2011

Favorite Decor Items

I wanted to share a few items that have my design wheels turning and mouth drooling right now. I hope to add some of these beautiful pieces to some of my DIY projects soon. Take a peek :).


 Pier 1 Rosette Hayworth Lamp $99
 IKEA Alvine Floral Pillow $19.99

ZGallerie Bukhara Pillow $69.95


JCP Cindy Crawford Draperies $39.99-$74.99


JCP Cindy Crawford Dubai Damask Draperies $34.99-$49.99

 ZGallerie Devon Mirror $199
 IKEA EKTORP Chaise, Blekinge white $299.99

ZGallerie Kensington Cake Stand $49.99


JCP Linden Street Set of 2 Butterflies Wall Decor $109.99


JCP Linden Street Spring Valley Draperies $29.99-$34.99


Do you have any items that you are currently in love with?

Thursday, September 29, 2011

DIY Fall Wreath


I’m not sure about you but I love how a wreath sets the stage for your seasonal décor. It’s the first impression to someone’s house to me. It’s like a sneak peek of the person’s style. Do they have simple, contemporary, elegant or traditional style? Maybe I’m just nosey J.
Wreath’s can be very expensive and I usually like the ones I can’t afford. Typical!
My goal for this week was to create a couple different wreaths and to discover the most cost effective ones by figuring the costs of supplies, time it takes to make and how the final product looks.

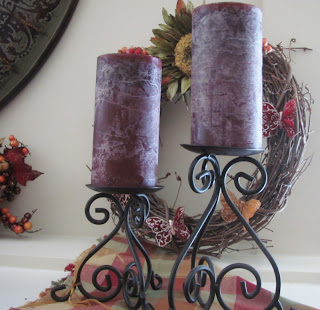
I stumbled upon an idea for my first wreath while shopping for another project. The branch type wreath immediately caught my eye. I pictured adding the pretty flower that I used on the velvet pumpkins and some sparkly butterflies. I love butterflies!!
Supplies:


I got too excited with the butterflies and forgot to take a picture before I used them. Opps! They cost $6.99 for a set of 8 and I used them for both wreaths.
Steps:
1.       Pull apart the flower, beads and leaves so each piece is separate.
2.       Lay out the design you would like.
3.       Once you are happy with the layout secure with a hot glue gun.


It’s that easy! It took me 5 minutes and the whole project cost me $9.99 plus tax J!

The second wreath I attempted was a little for time consuming. It took about 3 hours. I got the idea from another blog I follow and wanted to recreate it. I changed up the colors and finish product to add my own twist to it.
Supplies:


Steps:
1.       Spray a coat of the base color to the first side of the foam wreath.
2.       Let it dry for about 20 minutes and apply a coat to other side.
3.       Repeat steps one and two for adding the gold glitter and allow to dry for an hour.


4.       Start placing the beads in a pattern that works for you while leaving a 3 inch space for the ribbon at the top. I started in the middle and went about 6 inches in a horizontal direction. Once I achieved a somewhat straight line I would start filing in the area with the beads using a hot glue gun and continue the same process until complete. I left an opening at the top to add ribbon.  Some would probably have started with placing the ribbon but I needed to see the final product before selecting the right ribbon. Call me crazy!


5.       It took me about 2 hours to complete and I let it sit over night.
      6.       I finished the next morning by securing the ribbon and adding beads over the ribbon.


I ran into a couple of issues with this project. I had several beads fall off over night. It was very frustrating because I don’t know why they weren’t sticking. I used a generous amount of glue. The wreath is very bulky and took too long to create in my opinion. I felt that the effort I put into the project didn’t show through in the final result. The total cost for this wreath was $23.04 plus tax. It’s still cheaper than most store bought projects but looks cheaper than the first wreath to me.

What’s your thought?

Wednesday, September 28, 2011

First Fall Mantel


We recently moved into a new home with a fireplace. I relocated from South Florida where we don't have seasons. It's either warm, hot or extremely hot. I took advantage of this new climate in Georgia and decided to decorate our mantel for fall. Check it out :)


I created the banner with craft supplies that cost under $20.


The pumpkins were purchased from Hobby Lobby and they were 40% off! I used some metallic paint to add shimmer to them.


I found items on the clearance rack at Hobby Lobby and added them to an existing jar I owned. It all cost $5! I used napkins on clearance at Kohl's to add some color to the bland white mantel.


I created the wreath in this photo with some basic foliage on clearance from Hobby Lobby and butterflies purchased from Michael's. The whole project cost $10 and took me less than 5 minutes to make.


Tuesday, September 27, 2011

DIY Canvas Wall Decal

Have you ever wanted to purchase a great wall decal but you didn't because you immediately thought it's a lot of money to spend for a wall sticker?

When it came to decorating my daughter's room I knew that I wanted to have her name placed above her crib. Like usual, I wanted something unique. I loved the idea of using a decal but since we leased it wouldn't make sense to get one and place it on the wall. We also had knocked down walls and the decals didn't like to stick very well to a textured wall. I had to come up with a different way to use the decal.

First, I thought of placing the decal on a mirror. I looked at HomeGoods, Michael's, IKEA and Target and I couldn't find a mirror that matched the dimensions I needed. I was starting to get discouraged when I spotted the canvas section at Michael's. I was able to find one close to the dimensions of the wall decal. I had no idea if a decal would stick and was told by multiple craft specialists it probably wouldn't.

I took the left over satin latex paint (Behr Pearl) that I used for my daughter's room and rolled in on the canvas. I found the rolling technique worked better than brushing.

Once the canvas was dry, I centered the decal to the canvas and started the process of removing the decal paper so it would stick to the canvas. This was the most tidiest process which took the help of my husband and about 45 minutes to complete.


I attached some hooks from a picture I wasn't using and it was ready for it's debut.


Thursday, September 22, 2011

Simple Tray Makeover


I purchased two trays from my local Goodwill with the idea to spruce them up in a different way. I decided to add a pretty fabric to the tray and totally transform a tired looking tray for only $6 including supplies.


I tried two different techniques and preferred to cut a piece of fabric as closely to the size of the tray and use spray adhesive to secure it. Next, I would cut a bigger piece of fabric, glue it to the tray and then use a razor blade to cut the excess. This created a more seamless look.
The other technique I tried was cutting a piece a fabric a little larger then the tray and folding the edges over until it fit.


Technique #1

Technique #2


Wallah!

Monday, September 19, 2011

Yard Sale Finds

On a brisk cool Saturday I awoke at 4 a.m. and started getting ready for the amazing huge yard sales taking place. I stopped on my way to get my Starbucks coffee and off I went.  Yum :)
I've included some of my finds and the prices I paid. It was a great day!

The first stop I located this very unique white tray. I plan to add it to my diningroom and place some fresh fruit in it for a pop of color. Stay tuned.


I've been looking for a quilt or blanket to add to my bedroom collection but for a king sized bed it's very costly. I stumbled upon this beautiful gold damask chenille cover. It was brand new and still in the bag. Perfect!


My final great find was while walking out after purchasing the blanket. I hadn't seen it at first but it caught my eye. It was a brand new, still with tags, CHICO'S purple velvet jacket. It retails for $98! I can't wait to pair it with a nice top and scrarf for winter!


Do you have any great items that you purchased at yard sales?


Tuesday, September 13, 2011

DIY Fabric Jeweled Pumpkins

It all started on a Saturday morning while on a stroll at our local marketplace. I popped into a cute little boutique and fell in love with these adorable pumpkins. I'm always on the look for unique ideas that can't be found in department stores. I love the idea of having one of kind items to add to my home.


So off I went to the local fabric store to find any kind of fall fabric. I ended up getting velvet material and some abstract orange/cream material. I have to admit that I've never sewn a day in my life.

First, I cut the material into circles. I used items around the house to trace the circle. Next, I threaded my needle and began to loop in and out towards the end of the fabric about a 1/4 inch apart.


*Keep the Needle attached to the thread until you are completely done*

Once I completed the sewing portion I added rice to the bottom of the fabric and then filled with poly stuffing(the amount of stuffing all depends on the shape you are looking to get.)


I started to use regular sticks but I wasn't happy with the final product. I preferred to use a pumpkin top like I saw at the boutique but I was unable to locate so I decided to do something entirely new. I closed up the hole by pulling the thread. I looped in and out once more around the opening to secure it.

I attached fall leaves, flowers, garland and other materials with a glue gun to give the pumpkin a unique look.

Here's the Final Product! Not too Bad for an Amateur!